Current interior design developments cause a lot of detailed changes to your home. One of the changes is the texture of the ceiling. The design of data on the ceiling is not a current trend. It’s time to switch from flat design to unique texture.
The ceiling texture is one part of the room that you need to consider. The ceiling texture range is from casual to formal. There are many types of ceiling textures that you can choose to apply in your room.
For those of you who like the intricate appearance of the room, you might need to look at the knockdown ceiling texture.
For a formal room, you can have a comb display with a swirling pattern. If you want to apply a very textured ceiling, you can use a roller ceiling texture.
There are still several other types of ceiling textures that you can explore. Your job is to find the right one in your room. The texture or ceiling pattern can be decided according to the use of the room.
The ceiling design for the bedroom and kitchen does not have to be the same. That’s because each room needs a different design to offer, a different atmosphere to feel, and a different mood to enjoy.
Home designers say that choosing a layer of dry wall is perfect for the ceiling of your room. We pretty sure that you need a lot of recommendations and suggestions about the best ideas for creating amazing ceiling textures or you can make your own ceiling texture.
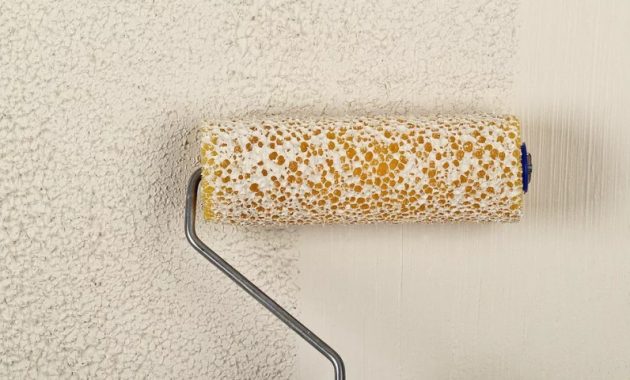
In making a ceiling texture, there are several tools that can be used, one of which is a roller. The advantage of roller is the ease of use and you can change the roller texture according to what you want.
In making textures, you can add granules to your ceiling to create textures or use thin compounds that are easy to dry. Both techniques have their advantages and disadvantages.
If you want to get a long-lasting ceiling texture, the right choice is to use thin compounds that are easy to dry. Even so, the two techniques have their own difficulties in the application process.
Before you start making textures on the ceiling, you need to prepare some supporting equipment such as brooms, mild detergents, masking tape, plastic sheeting, sanding sponges, shelves, paint containers, texture granules, gypsum compounds, water, rollers. After you have prepared everything, you can start the job.
Preparing the Room
Prepare a ceiling to paint by washing it with a cleaner to remove cooking oil or nicotine stains.
Apply the primer sealer to the ceiling which is stained by water leakage so that the stain does not get into your new paint.
Next, cover all the furniture and walls using plastic to prevent falling paint.
Don’t forget to glue the plastic cover so it doesn’t move position when exposed to the wind.
The next step is sanding. Emery the ceiling with a rough type sanding sponge to harden the surface and increase adhesion.
Next, clean the dust that sticks after sanding using a dry cloth.
Painting the First Layer
Once the ceiling is clean, you need to prepare the first layer of paint.
All you need to do is pour half a can of paint into the container and give the solvent and stir it.
Mix the texture paint by combining the dry texture material into latex paint.
Follow the instructions on the bag to get the right mix of mixed textures to paint.
Mix with paint paddles attached to the drill until the mixture is smooth and pour very slowly.
Attach the roller screen to remove the excess texture from the rollers. The longer the nap on the roller, the deeper the texture will be.
Do not put excessive pressure on the roller or the roller will slide and leave a flat area on the textured surface.
Dip the paint roller into the texture, roll it across the screen and start applying it to the ceiling about 2 meters from the wall.
Roll the paint towards the wall and stop right before touching. Continue rolling from the wet edge to the unpainted part.
Works fast because most texture paints are arranged quickly. Using the roller extension handle allows you to work from the floor.
It also makes it easy to see places that need more texture.
Making Ceiling Textures
After you have finished making the first layer. The next step is to pour the remaining paint and add texture granules to the mixture. Mix well.
Once evenly distributed, pour the paint into the roll container. Next, dip the roll into the container and tap on the edge of the container to reduce the lumps of paint on the rollers.
If the paint is not too dense in the rollers, roll it to your ceiling at once. Roll the rollers in a straight line until there is no paint on the rollers.
After you make a second coat of paint using rollers, you can use a comb or other tool that can form a texture on the ceiling.
Change the appearance of the texture by using a trowel to make swirls or other designs before drying. Sponges, brooms, combs and wrinkled paper produce different designs in paint texture.
If you don’t think the texture is what you want, you can cover it with paint using a roller. Do it repeatedly to get the maximum texture results.
Because the paint used is dry quickly, you need to be careful and fast in doing this work. Finish the edge near the wall with a brush to avoid the texture on the wall.
Let the ceiling be textured as it is, or paint with the color of your choice after the texture is completely dry.
With this technique, you can make the ceiling texture quickly and as you wish. In addition, you can also use various color or texture combinations to further enhance your palate. That’s how to make textures using rollers. May be useful!
Keyword: Ceiling Texture